Why Surface Mount Devices (SMDs) must be dry packaged
Before we dive into how to dry package electronic components, it’s crucial to understand why moisture-sensitive devices (MSDs) require proper protection. SMDs, or Surface Mount Devices, are plastic-packaged integrated circuits (ICs), commonly referred to as chips or electronic devices.
These components contain a delicate internal circuit encased in a plastic body with metallic leads connecting the circuit to a printed circuit board (PCB).

The problem: moisture absorption in SMDs
The plastic body of an SMD absorbs moisture (humidity) from the surrounding environment. Over time, this moisture diffuses into the spaces between the plastic body, lead frame, and internal circuitry.
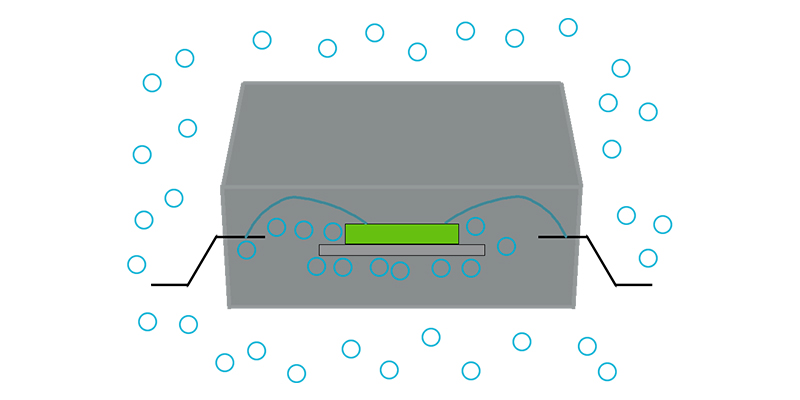
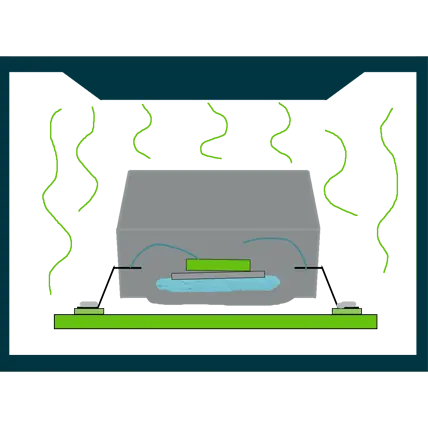
When the SMD is soldered onto a PCB, it undergoes high temperatures during the reflow soldering process.
The trapped moisture rapidly expands into vapor, leading to damage such as:
- Popcorning – The expansion of trapped moisture can cause the plastic package to crack.
- Delamination – The separation of internal layers within the SMD, compromising its structural integrity and performance.
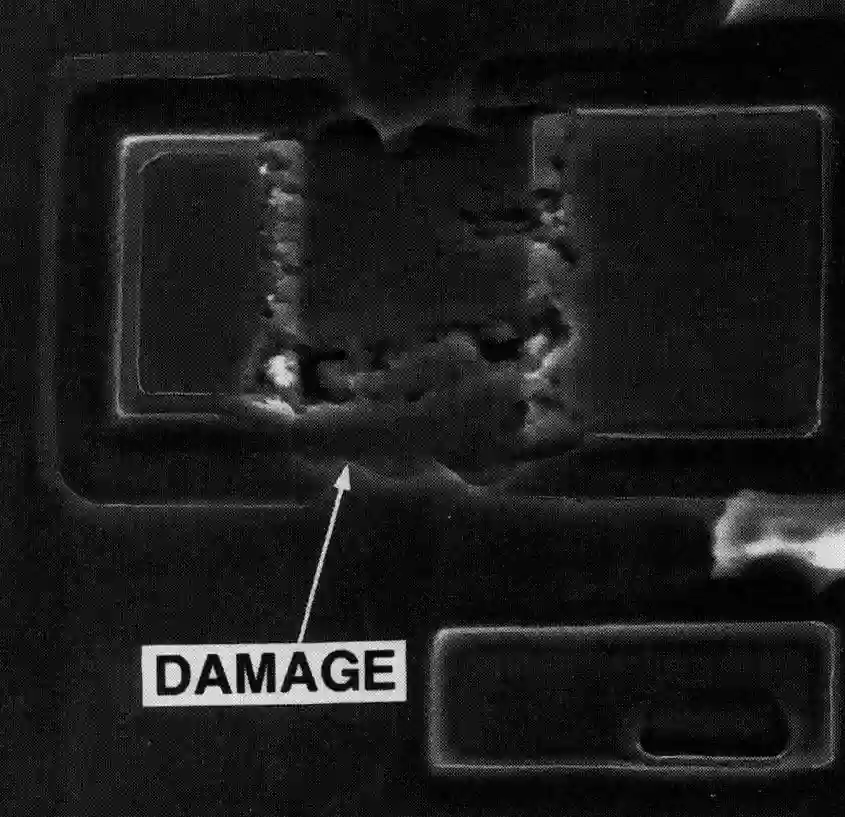
Featured (left) is a photo of a damaged SMD. This SMD was not protected by a dry package. This is why it is important to keep SMD’s dry before soldering.
How to properly dry package SMDs
There are four essential components in creating a moisture-proof dry package:
1. Moisture Barrier Bags (MBBs)
Moisture Barrier Bags, also known as Dri-Shield bags, are designed to protect electronic components from moisture ingress and electrostatic discharge (ESD protection). These bags are made with a multi-layered structure that blocks moisture vapor transmission and provides ESD shielding to safeguard sensitive components.
2. Desiccants
Desiccants are drying agents placed inside porous pouches that absorb excess moisture from the air trapped inside the sealed barrier bag. The desiccant remains dry even when fully saturated, ensuring that the internal humidity remains low.
🔹 Learn more: Guide to Using Silica Gel Desiccants
3. Humidity Indicator Cards (HICs)
Humidity Indicator Cards are printed with moisture-sensitive spots that change color based on the relative humidity inside the package. These allow quick visual confirmation of moisture levels when the package is opened, ensuring the integrity of the moisture protection system.
4. Moisture Sensitivity Level (MSL) Labels
MSL labels indicate how long an SMD can remain exposed to ambient air before soldering. These labels must be attached to the outside of the Moisture Barrier Bag and marked with the appropriate MSL level. If the level is missing, refer to the barcode label.
Step-by-step guide to creating a Dry Package
Follow these steps to properly seal and protect your SMDs from moisture and electrostatic discharge:
- Prepare the tray stack – Place the desiccant and HIC on top of the tray stack. Store desiccant in an airtight container when not in use to maintain effectiveness.
- Label the Moisture Barrier Bag – Attach the MSL label and mark the appropriate sensitivity level.
- Insert components into the MBB – Carefully place the tray stack with desiccant and HIC inside the Moisture Barrier Bag.
- Seal the bag – Using a vacuum sealer, remove excess air and heat-seal the bag. A slight evacuation is recommended to ensure the bag fits securely in storage or transit packaging.
What if your devices are exposed to air?
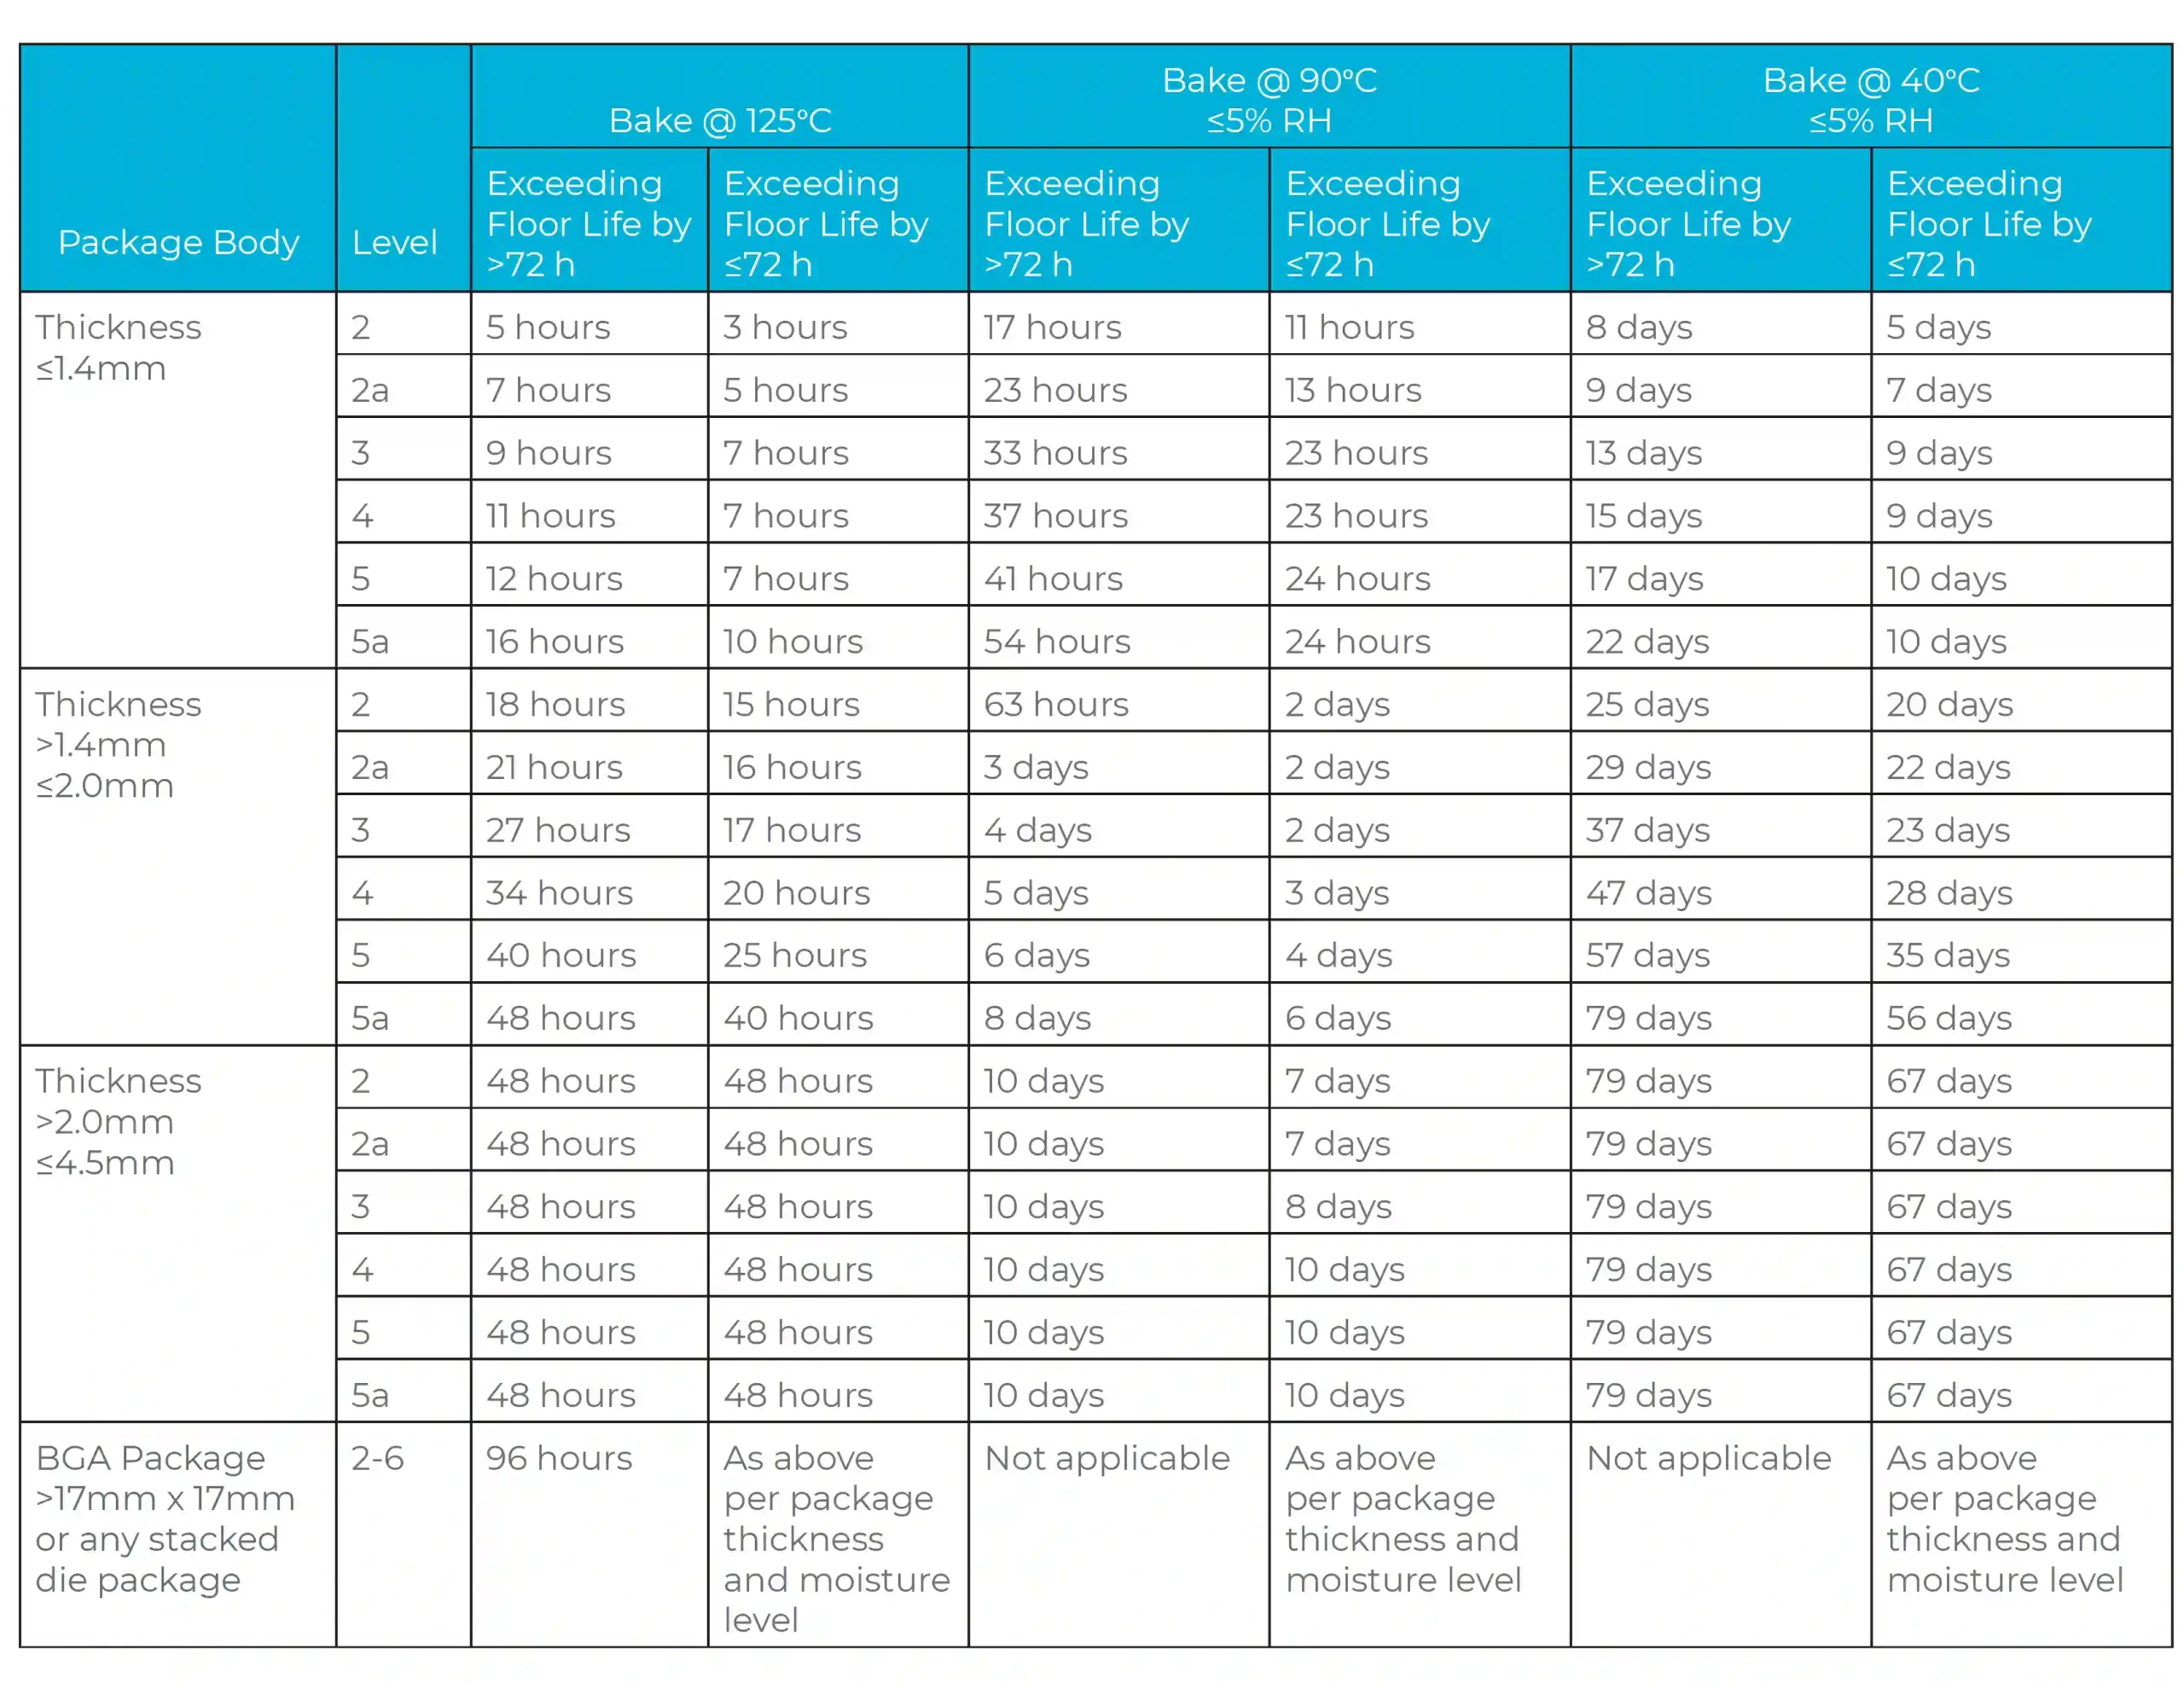
If your moisture-sensitive devices (MSDs) are left exposed to ambient air for extended periods, they must be baked before reflow soldering. Refer to the industry-standard bake times and temperatures in the table below for specific MSL levels.
📌 Pro Tip: Always store sealed MBBs in a low-humidity, temperature-controlled environment to maintain optimal protection.
Protect your SMDs from moisture and ESD damage
Don’t let moisture and electrostatic discharge ruin your sensitive electronic components! Proper dry packaging with Moisture Barrier Bags, Desiccants, and Humidity Indicator Cards ensures moisture control and ESD protection for your Surface Mount Devices.
Need high-quality dry packaging solutions? Contact Antistat today for ESD-safe storage solutions, moisture-proof bags, and expert advice on safeguarding your components!


